In the current day of globalized e-commerce, having a payment method that can work across the whole world and all marketplaces is more than a necessity. However, having a separate bank account/credit card for each different marketplace is not an easy task and just waiting for problems to happen. No worries though there is a solution that you can depend on called Payoneer.
A catchy name isn’t it? Payoneer is a payment services provider that pioneered -no pun intended- the industry as an easy-to-use and affordable solution that allows its users to receive, withdraw, and make payments via different banks across the globe. Not stopping there, Payoneer took the e-commerce industry by storm, partnering up with e-commerce giants such as Amazon, eBay (Main Partner), Walmart, Allegro, Zalando, Otto, and more, making seller job a whole lot easier to manage their payments across all marketplaces. Let’s get into the details of how to open a Payoneer account.
1.Registration page and choosing account type
First off go straight to registration page from this link. You will be instantly dropped to the registration page.
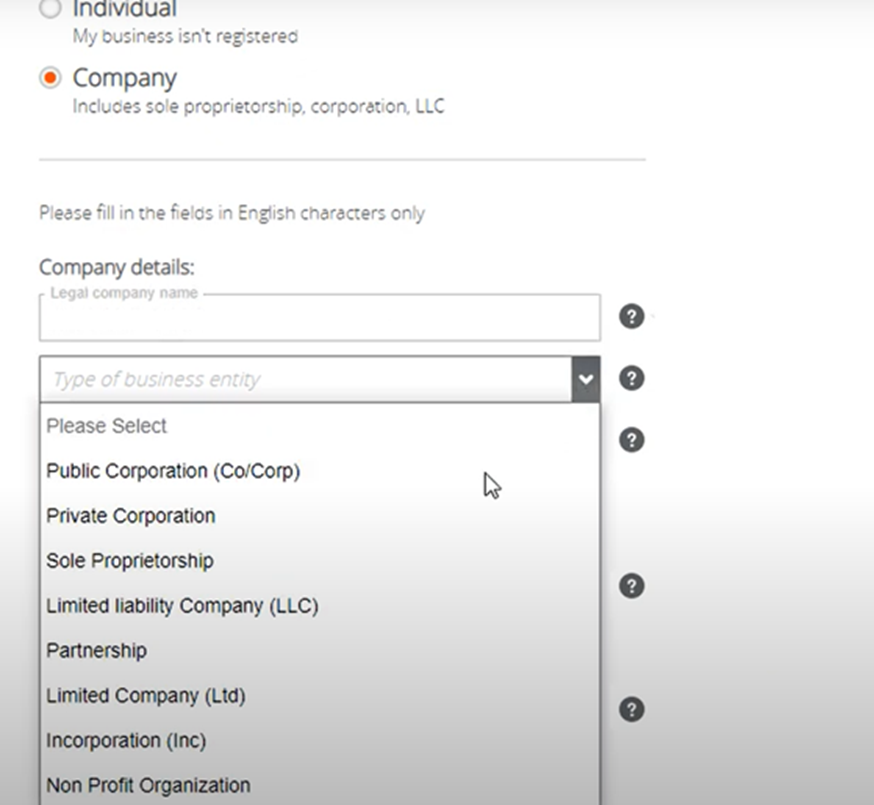
Select the correct account type from two options; “Individual” and “Business” Your choice will decide what kind of documents to submit and the type of bank account to connect to Payoneer.
Individual: Individual account in your name. You will need to submit your ID (Passport, driving license, or government-issued ID) and connect an individual local bank account in your name.
Business: Business account on your business’s name. You will need to submit your ID, and your business license and connect a business local bank account on the name of your business name.
If you are reading our blog chances are high that you are a business that wants go get into e-commerce. So let’s suppose you have chosen the account type as business.
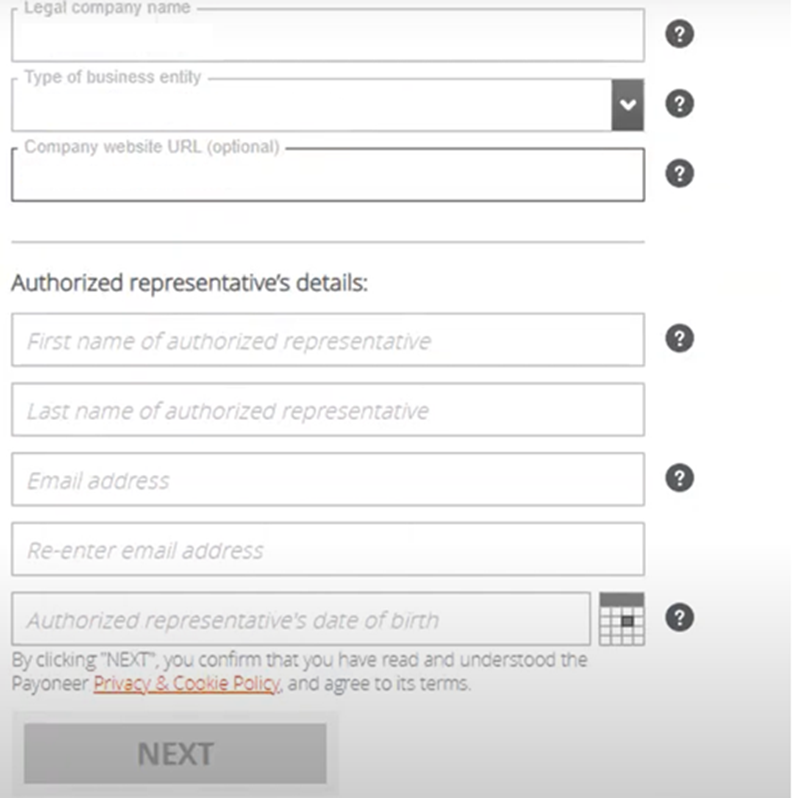
Enter your business name as exactly it shows in the business license. Select the appropriate business type from the drop-down list. Enter your first and surname, an e-mail address, and your date of birth. Double-checking your date of birth is recommended. Payoneer exclusively uses the date of birth for verification.
2.Business and account info
Enter your business address exactly as in the business license, this is very crucial for successful registration. Failing to do so can result in the suspension of your account.
Enter a phone number and write down the code that was sent to you to complete the verification.
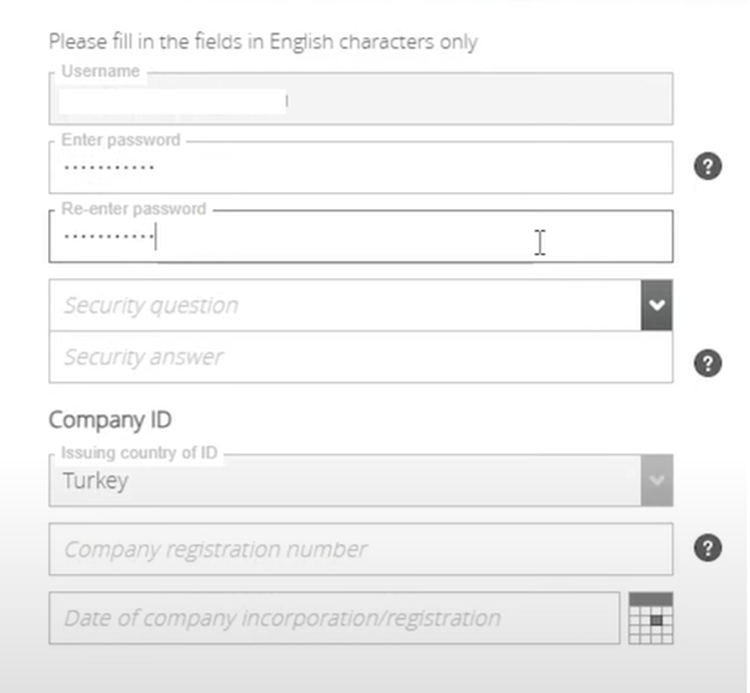
Choose the password of your choice. Be sure that it’s a strong password to ensure the safety of your account.
Enter your company registration number and date of incorporation/registration as exactly how it is on your business license. Again this is very crucial for a succession of your registration.
3.Connecting your bank account to Payoneer
Payoneer allows you to have bank accounts in different currencies but you need to connect your bank account to Payoneer both for verification purposes and to be able to withdraw your money that has been gathered in your Payoneer account. Payoneers can take an exchange fee when withdrawing your money depending on the bank.
Fill in the required info to connect your bank account such as your bank’s location, your bank account’s currency, your bank’s name, IBAN / BIC, etc.
Keep in mind you have to connect a business account if you have chosen your account type as “Business”. And individual accounts for vice versa.
Click on boxes that you acknowledge Payoneer’s policies.
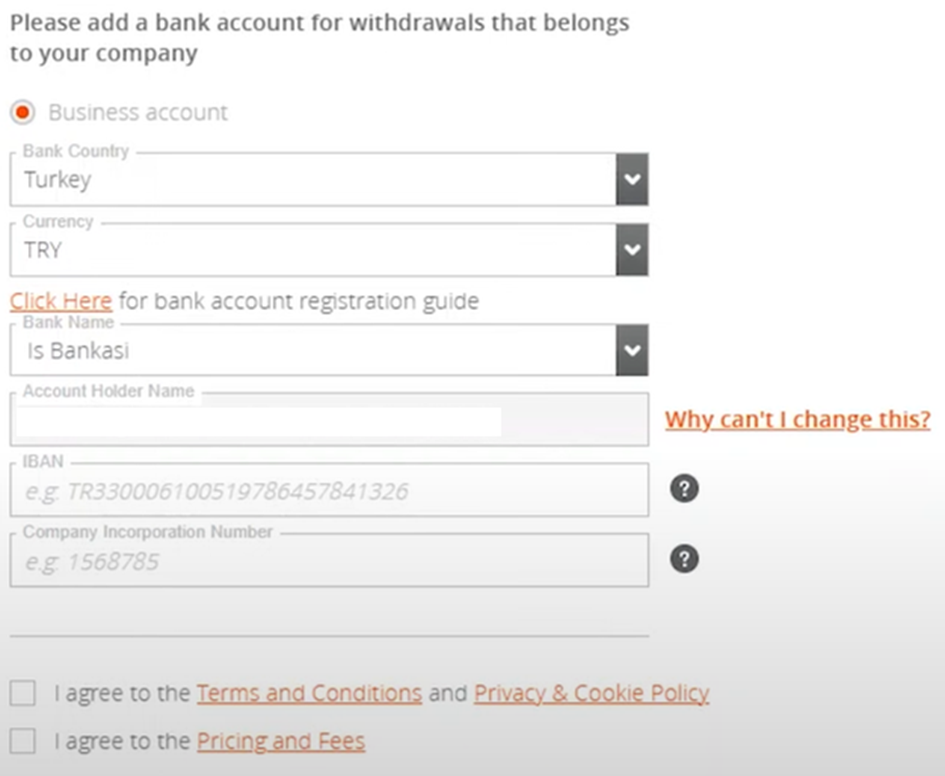
And done you have opened your Payoneer account!
Keep in mind Payoneer’s policies and partners can change over time.
Related Articles
How to Create Product Titles on Amazon
Product titles are one of the most crucial components of Amazon products and directly impact sales success. The title of the product you list on Amazon should be descriptive, unique, and understandable. By paying attention to the points mentioned in this article, you...
How to Open a Seller Account on Amazon Europe
Are you ready to start to cross border e-commerce but don't know how to open a seller account on Amazon Europe? For you, we've provided detailed information on opening a seller account in Amazon Europe and selling to all European countries from a single panel with...
What is Amazon FBA? What are its advantages?
Amazon, the world's largest internet site and marketplace, introduced a new innovation to the world of e-commerce with its FBA (fulfillment by Amazon) system. FBA is a significant initiative that makes e-commerce management, already quite practical, even more...


